DIY Toddler Dress: Upcycle Old Women’s T-Shirt – Sewing Project
This post may contain affiliate links, which means I’ll receive a commission if you purchase through my links, at no extra cost to you. Please read full disclosure for more information.
Today’s upcycle project post is how to turn a women’s shirt into a DIY toddler dress. This was a simple beginner sewing project for me to complete, and it took less than an hour to refashion the shirt.
Finding a Women’s Shirt to Refashion
See, I have this old shirt I’ve been holding onto forever. I wore it the day I found out I got into optometry school, and it brings back good memories. It’s been a good shirt over the last 15 years I’ve had it, but you know, there comes a time when you’ve been in your 30’s for a while and when it’s just not age-appropriate to still wear some of the same styles you wore in college. This shirt is now too small anyway, so it is just time to part with it from my wardrobe. See, here’s the beautiful shirt itself:

I decided I didn’t want to completely get rid of the shirt but instead I could make it into a dress for my two-year old! That way I still get to keep it, but it actually gets worn by someone. This was so easy to make a DIY toddler dress.
I’ll give you a quick tutorial how I refashioned my old women’s shirt to this dress. Pictures speak louder than words, I think, so I’ve included a lot. Also, since all shirts are different sizes and styles and all kids are different sizes, I didn’t include specific measurements. I’m just showing the process. That way you, too, can start thinking like a refashion guru when you look at old clothes!
Toddler Dress Supplies
- An old women’s shirt
- Sewing machine or needle and thread
- Scissors
- Measuring tape and measurements of toddler being fitted for a new dress or an existing dress as a template
- Pins
And here’s how I made this DIY toddler dress:
My daughter has a ton of dresses already, so I used one of her existing dresses to get measurements. That way I didn’t have to catch a squirmy 2-year old and keep measuring her with a measuring tape.
First, since my shirt was too large around, I decided to take a little fabric off the sides first to match the width of the toddler dress example. While I only cut the bottom part off in this picture, I actually took up the with of the dress on top of the elastic portion as well.

I then took a little off the bottom to make the perfect dress length. I sewed a hem at the bottom to neaten things up as well.

I also made the sleeve holes smaller on both the top and bottom to fit my daughter’s arms and chest. I guesstimated this a little bit. Luckily it worked out well!


So after a little pinning and sewing and cutting, here’s the inside of the dress:

I turned the dress back right side out, and had to take up just a little bit more on the top of the dress to make it fit. I also stitched the drawstring nice and tight to keep it from gapping when she wore it.
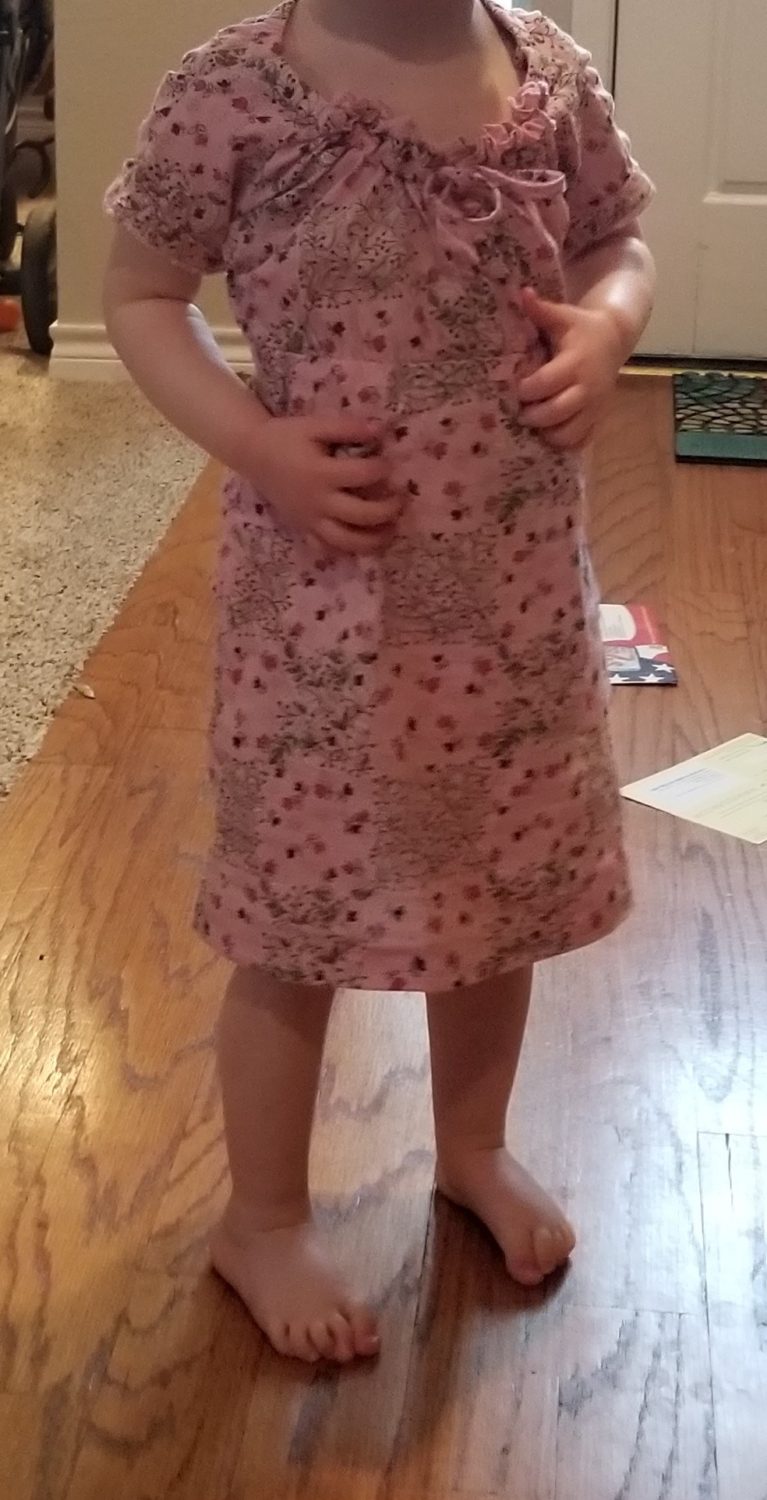
And here’s my daughter wearing it. It is so hard to make a 2-year old stand still for a picture, so I apologize for the blur! Overall, I think my DIY toddler dress turned out really cute, and since I upcycled a women’s shirt to make it, this project cost me next to nothing! I love experimenting with refashioning and upcycling!

Check out more of our sewing ideas and upcycling ideas!
