How to Upload SVG Files to Cricut Design Space Tutorial
This post may contain affiliate links, which means I’ll receive a commission if you purchase through my links, at no extra cost to you. Please read full disclosure for more information.
.If you’re new to the Cricut universe, one of the first things you might be wondering is how to upload SVG files to Cricut Design Space. This quick tutorial will have you adding images to Design Space in no time!
When I first got started with my Cricut, it was so much easier to use premade SVG files from other designers rather than try to create my own. Once I learned how they created their cut files and got an idea of how to work around Design Space, I started to create my own images.
In order to use other people’s SVG files, you have to know how to load them from your computer to Cricut Design Space. That’s what I’ll show you in this tutorial.
But first, here’s a YouTube video I made if you prefer to watch rather than read. If you don’t like videos, keep reading and you’ll find the text version of how to upload SVG files to Design Space.
What is an SVG File?
An SVG file is a Scalable Vector Graphics file. It’s a resolution-independent file format that is popularly used in print graphics. It’s also the preferred cut file type for Cricut Design Space.
The great thing about SVG files is you can find so many files for free (or very cheap)! For the occasional crafter, this saves you from having to purchase Cricut Access every month. And for the busy crafter who doesn’t have time to design every single element, readily available SVG files are a great convenience. Just remember to respect other designers’ intellectual property, so always check for licensing information before using or distributing a file of any format.
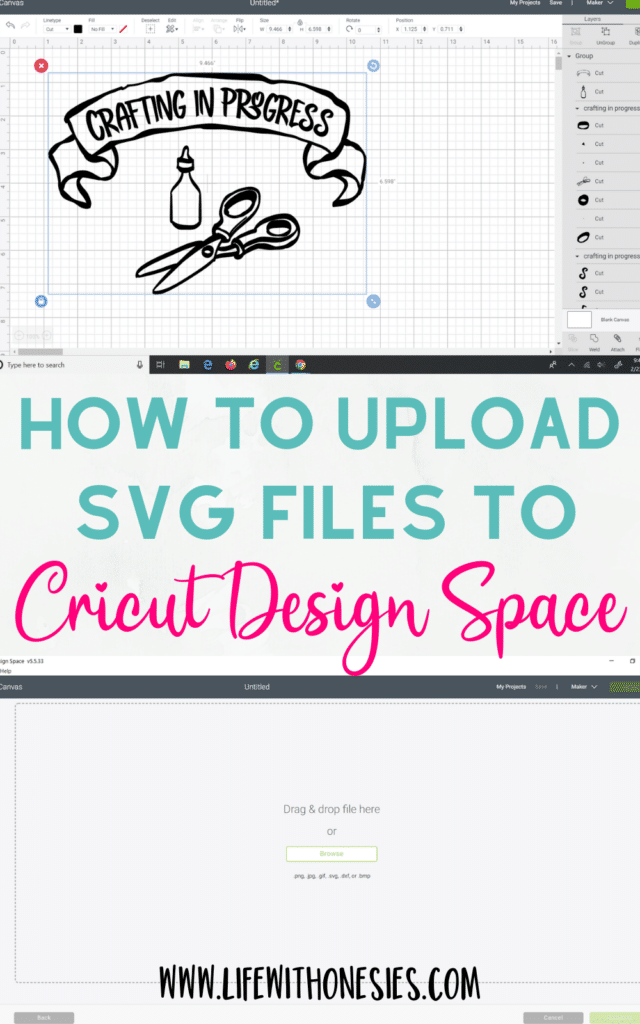
How to Upload An SVG to Cricut Design Space on Your Computer
If you haven’t already set up your Cricut, do that here. I also have a step-by-step tutorial for how to set up your Cricut Maker from right after I did my initial Cricut Maker unboxing.
Then, make sure you’ve saved your SVG file to your computer with an identifiable name and in a location you’ll remember. If you downloaded a .zip version, you will need to extract it first. Cricut Design Space, at this time, does not support uploading of .zip files.
Also, if you’re wanting to upload multiple SVG files to Design Space, you will, unfortunately, have to upload them one at a time. I haven’t yet found a way to import multiple SVGs at once, and I’d love to hear if any of you have figured it out!
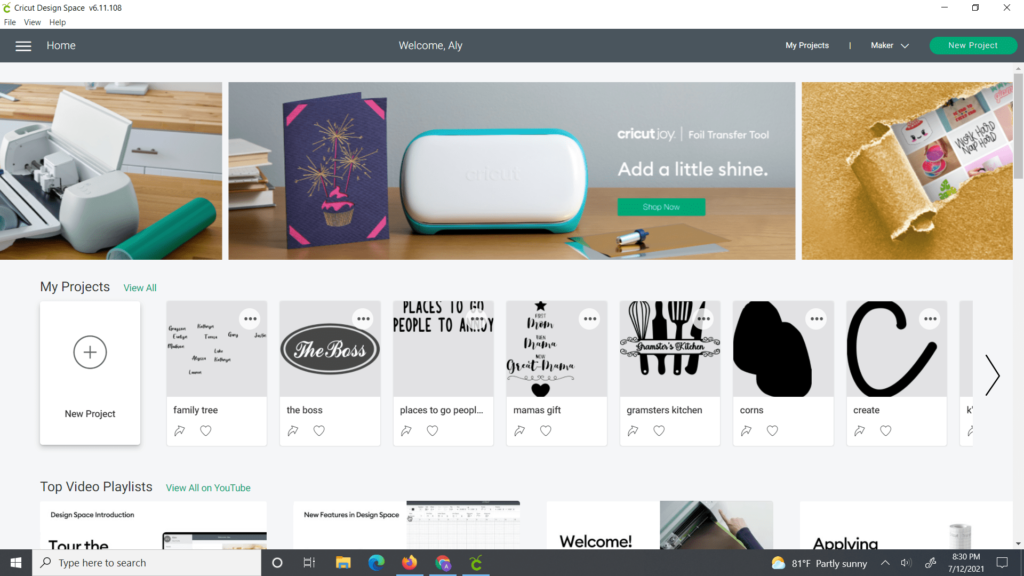
After your Cricut and file are prepared, open Cricut Design Space on your computer or phone. This will bring you to your Home page of Cricut Design Space. Under My Projects, click the plus sign in a circle that says “New Project.”
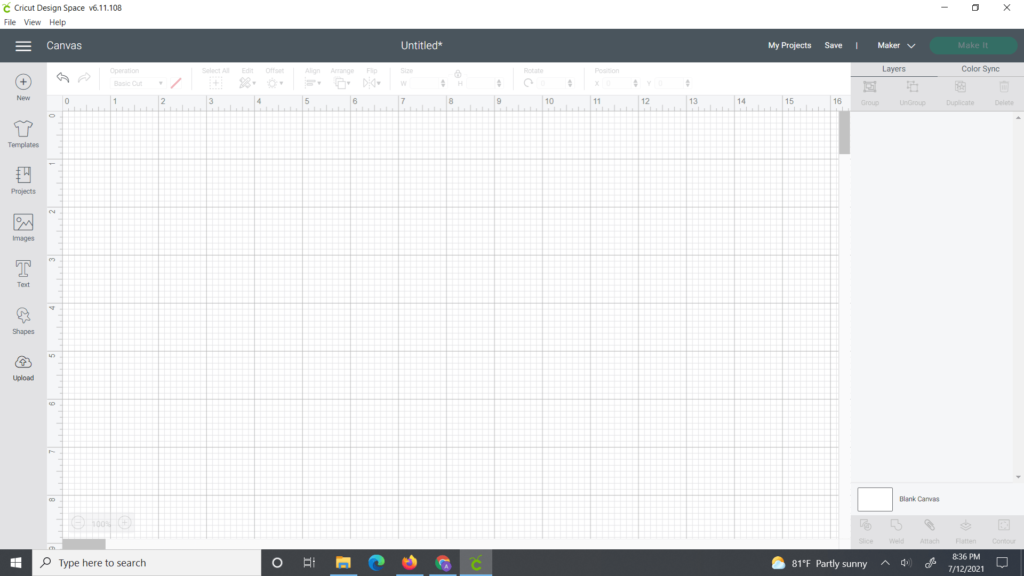
This will start a new project. You will see the Cricut grid taking up the majority of the screen. On the far left of the screen, there will be a long line of icons. Click on the icon that says “Upload.” It will be a cloud with an arrow inside it.
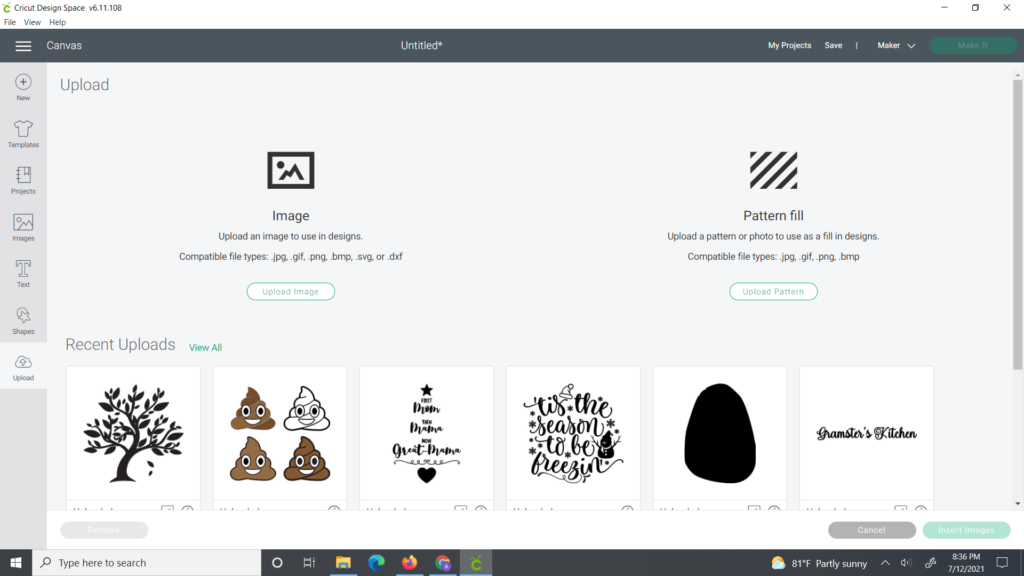
This will take you to the upload page. One side will be for uploading images, and the other side will be for uploading pattern fills. Since you’re looking to upload an SVG into Design Space, click on the button underneath Image that says “Upload Image.”
A new screen will pop up. You can either drag and drop your SVG directly onto the upload area, or you can click “Browse” to locate it on your computer. (This is why it’s important to name it appropriately and save it to a location you’ll remember!)
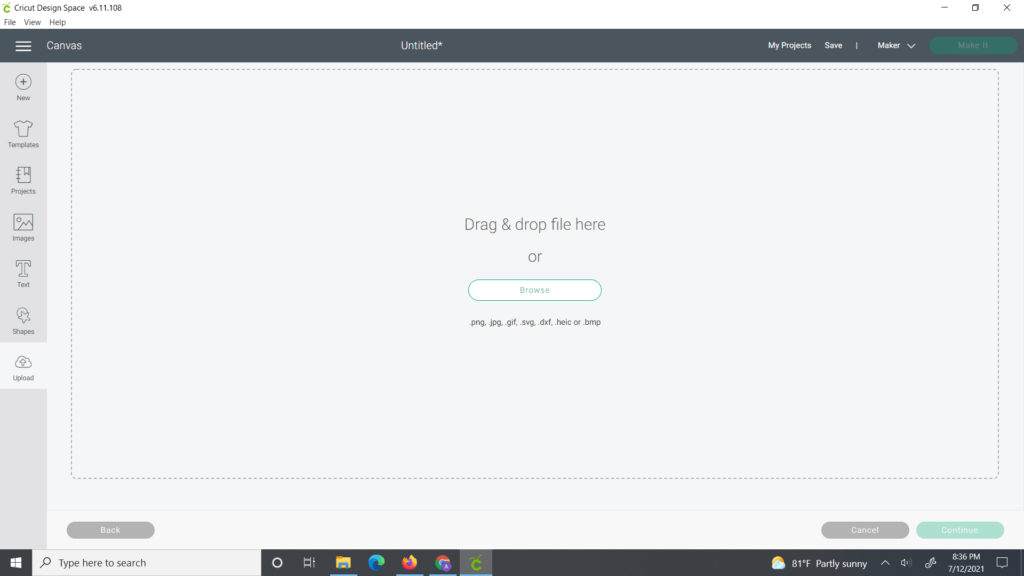
Once you’ve found it in its saved folder, click on the file and then “Open.”
A preview of the image will appear on the left of the screen, and information for the image will appear on the right. Here, you’ll get a chance to put a title for your image and a tag or two. You will want to pick an image name you haven’t used before. As for tags, these are not required. But, they are useful in helping you organize your uploaded files once you start to accumulate a ton of images.
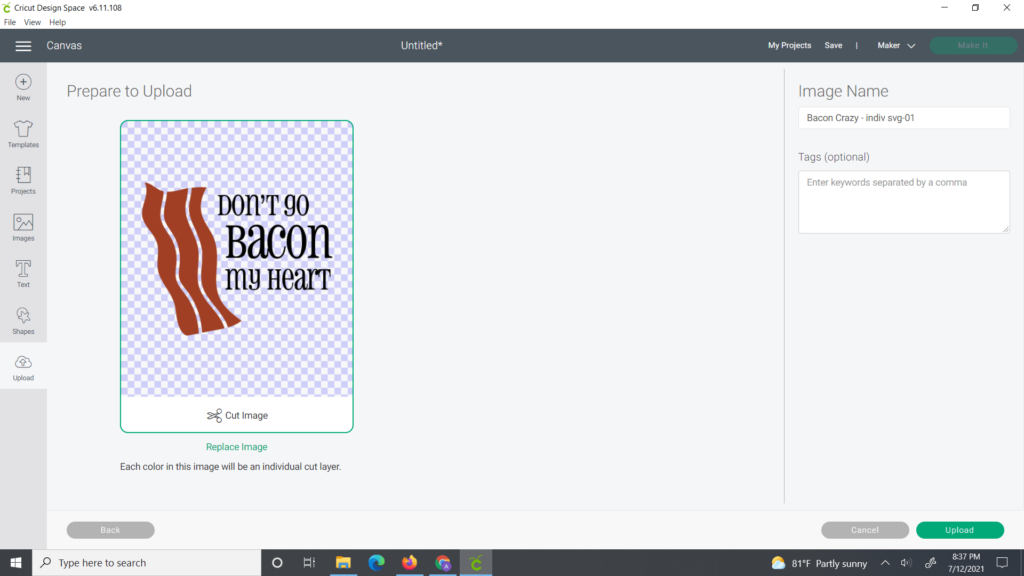
Once you’ve added any information you want, click “Save” on the bottom right of the screen. Now your SVG file will appear on the far left under “Recently uploaded images.”
If you want to immediately insert your SVG file into your design, click on the image itself. Then, click “Insert Images” on the bottom right of the screen. You can insert more than one image if you would like onto the canvas. (Remember, you can only upload one image at a time, though.)

Your image will insert onto the canvas.
And there you have it! I hope you have a better grasp on how to upload an SVG to Cricut Design Space now!
